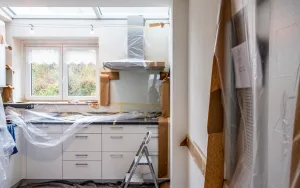
Treating a house renovation as a clear plan of action makes it much easier to manage than working from a loose list of ideas, according to the Federation of Master Builders. A structured approach helps UK homeowners decide what to tackle first, whether updating one room or preparing for structural work.
When to start your final inspection in the renovation stages
A renovation project follows a set sequence, and snagging belongs near the end of that timeline. According to ChecklistGuro, a renovation breaks down into nine manageable stages: Planning, Design, Demolition, Structural, Rough-In, Finishing, Painting, Inspection, and Closeout (checklistguro.com/blog/renovation-project-checklist).
The Federation of Master Builders advises UK homeowners to treat a renovation as a clear plan of action rather than a loose list of ideas, prioritising essential repairs to the home’s fabric before cosmetic upgrades (fmb.org.uk/resource/house-renovation-checklist-a-step-by-step-guide-for-uk-homeowners.html). That same logic applies to staging your inspection.
To reach the Inspection stage ready for snagging, confirm these prerequisites from the earlier phases:
- Planning and funding are secured, so work does not pause mid-project due to unresolved finance decisions (checklistguro.com/blog/renovation-project-checklist).
- Design choices are locked in, with materials ordered well ahead of time to account for long lead times on custom items like cabinets or specialty tiles (checklistguro.com/blog/renovation-project-checklist).
Only when all eight preceding stages are done should you begin compiling your snagging list. The Inspection stage exists specifically to catch those issues before you move into Closeout, where final payments and sign-offs happen. Keeping this order prevents costly mistakes and ensures you hand over a complete list at the right moment (checklistguro.com/blog/renovation-project-checklist).
What to look for when checking design and material choices
A reliable way to verify installed finishes is to compare them directly against the physical samples you approved during the design stage, rather than relying on memory or online pictures. According to ChecklistGuro’s renovation project checklist template, colours can look drastically different depending on the light, so you should always view materials in your own space under your own lighting before confirming they match what was ordered.
Use this decision rule when walking through finished rooms: if a surface does not match the sample you viewed under your home’s lighting, mark it as a snag. This applies to flooring, tiles, countertops, paint colours, cabinet styles and hardware. Do not accept a finish simply because it resembles the showroom display, as the actual installed item needs to function within your specific room.
Your material board serves as the reference point for these checks. ChecklistGuro advises creating a visual roadmap that includes everything from large items down to smaller details like doorknobs and outlet covers, ensuring all selections work together harmoniously. When you inspect the completed work, hold each installed element against that board.
- Bring the physical paint chips and fabric swatches into the room and compare them to the walls and soft furnishings in natural and artificial light.
- Check that small hardware pieces, such as handles and outlet covers, match the exact style recorded on your digital or physical mood board.
The Federation of Master Builders notes on their house renovation checklist guide for UK homeowners that treating a renovation as a clear plan of action makes the process much easier to manage. Applying that same structured approach to your final inspection means you are verifying deliberate decisions rather than just browsing for faults.
Deciding which snags need a qualified professional
When you walk through a finished renovation to compile your snagging list, some faults are straightforward cosmetic issues you can record yourself. Others involve hidden risks that require a specialist to assess and resolve safely.
However, problems involving structural support, electrical circuits, gas lines, or hazardous materials sit firmly outside what you should attempt to diagnose or fix alone.
If your inspection uncovers foundation cracks, settling, or water damage, addressing these before moving forward is non-negotiable and might involve underpinning or partial foundation replacement by experienced professionals.
The Federation of Master Builders notes that building regulations approval may still be necessary even when planning permission is not required, especially if the work affects the structure, drainage, insulation, electrics, or fire safety in England and Wales (fmb.org.uk/resource/house-renovation-checklist-a-step-by-step-guide-for-uk-homeowners.html). This is particularly relevant if a load-bearing wall was removed, as the correct structural support must be designed and approved before work begins.
Use this boundary to sort your snagging list into two categories:
- Cosmetic items you can photograph and note yourself, such as paint touch-ups or finish alignment.
- Safety-critical items requiring a qualified professional, including suspected asbestos or lead paint, which must be professionally assessed and remediated rather than disturbed during your inspection.
If you are unsure whether a snag falls into the safety-critical category, check references and ensure any architect, designer, or contractor you consult is properly licensed and insured. Treating your renovation as a structured plan of action rather than a loose list of ideas makes it much easier to manage these hand-offs between your own observations and specialist assessments.
Organising your snag list before signing off renovation work
A house renovation is much easier to manage when you treat it as a plan of action rather than a long list of ideas, according to the Federation of Master Builders (FMB). This principle applies directly to how you present your findings during project closeout.
Group your observations by the stage of work they relate to. A comprehensive renovation checklist breaks a project down into stages such as finishing, painting, inspection and closeout, as outlined in a template published by ChecklistGuro. Sorting your snags under these same headings means your builder can address all the painting touch-ups together, then move on to finishing details, without walking back and forth across the property.
Within each group, separate essential repairs from cosmetic improvements. The FMB advises focusing first on essential work such as repairs, electrics, roofing or insulation before committing to larger cosmetic improvements (fmb.org.uk). Your snag list should reflect this priority. Structural or safety-related defects belong at the top of the relevant section, while minor aesthetic issues sit below them.
Present your findings in a clear format so everyone agrees on what needs attention. Consider using these steps:
- Write a short description of each defect, noting exactly where it is located in the room or on the surface.
- Mark which trade is likely responsible for the fix, such as a painter, electrician or joiner, so your main contractor can schedule the right person.
- Add a column to record when the item was checked and whether the repair is complete.
- Leave space for your builder to note any parts or materials they need to order before returning.
Keep the document practical and focused on the specific work agreed in your contract.